How to Install Resin Driveway: Complete Step-by-Step Guide
Transform your property with a stunning resin driveway that combines modern aesthetics with exceptional durability. This comprehensive guide unlocks professional installation secrets that ensure flawless results lasting decades.
You’ll discover critical preparation techniques that prevent costly mistakes, expert mixing methods for perfect consistency, and proven application strategies used by industry professionals. Learn how to achieve showroom-quality finishes while avoiding common pitfalls that compromise surface integrity.
Whether you’re upgrading an existing driveway or starting fresh, mastering these time-tested techniques delivers impressive curb appeal and substantial property value increases. Ready to create the entrance of your dreams with confidence and precision?
Planning and Preparation for Resin Driveway Installation
Proper planning is the foundation of a flawless resin driveway. From inspecting your existing base for structural integrity to calculating precise material quantities, every step matters.
Understanding Base Requirements
The foundation determines the success of your resin driveway installation. A solid base ensures proper load distribution and prevents future cracking or settlement issues.
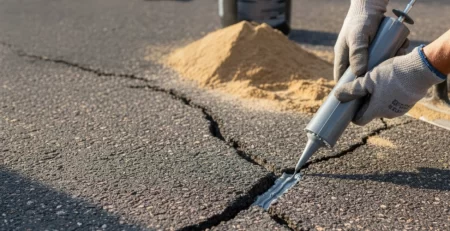
Your existing concrete or tarmac base must be structurally sound and capable of handling the intended traffic loads. Inspect thoroughly for cracks, weak spots, or surface damage that might compromise bonding effectiveness.
Essential Material Calculations
Calculate the exact quantity of resin and aggregate needed for your project area. Insufficient materials can create visible joints and inconsistencies in the finished surface.
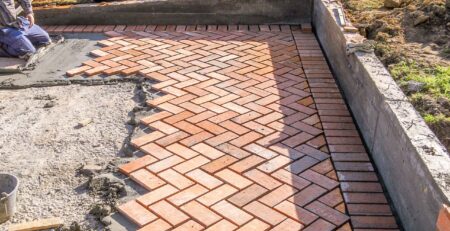
Mark out a grid pattern using chalk to ensure even application across the entire driveway area. This systematic approach prevents material waste and maintains consistent thickness throughout.
Weather Considerations
Avoid installation during rain or when moisture is present on the surface. Water contamination creates white patches and compromises the curing process completely.
Temperature requirements are crucial – ideally, install when temperatures remain above 5°C for optimal resin performance and proper adhesion.
Surface Preparation Techniques
Before any resin installation begins, setting the right foundation is crucial. Follow these expert-approved techniques to prevent future issues and guarantee a smooth, durable result.
Base Cleaning and Assessment
Sweep the entire area thoroughly to remove all dust, debris, and loose materials that could interfere with proper bonding. Apply primer to the base surface when working with concrete or weathered tarmac to enhance adhesion between the substrate and resin mixture.
Drainage Setup
Ensure proper drainage around the perimeter to prevent water accumulation that could undermine the installation’s integrity. Check that the surface has adequate slope for water runoff, typically 1-2% gradient away from buildings and structures.
Final Preparation Steps
Remove all weeds and vegetation from cracks and joints using appropriate tools or herbicide treatments before installation begins. Test the base strength by walking across the surface and checking for any soft spots that might require additional reinforcement.
Resin Mixing Process
Achieving a strong, even bond starts with properly blending your two-part resin system. Follow these guidelines to ensure your resin mix performs at its best.
Two-Part Resin System
Part A and Part B components must be thoroughly combined to activate the resin’s binding properties effectively. Use a paddle mixer for consistent blending, ensuring complete integration of both components before adding aggregate materials.
Aggregate Integration
Add dried aggregate gradually while mixing continuously until all stones appear wet and completely coated with resin. The mixture should achieve a uniform wet appearance throughout, with no dry spots or uncoated aggregate visible.
Working Time Management
Begin application within 10-15 minutes of mixing, as the resin starts curing rapidly once activated. Prepare only the amount you can apply within the working time to avoid waste and ensure optimal surface quality.
Application Techniques
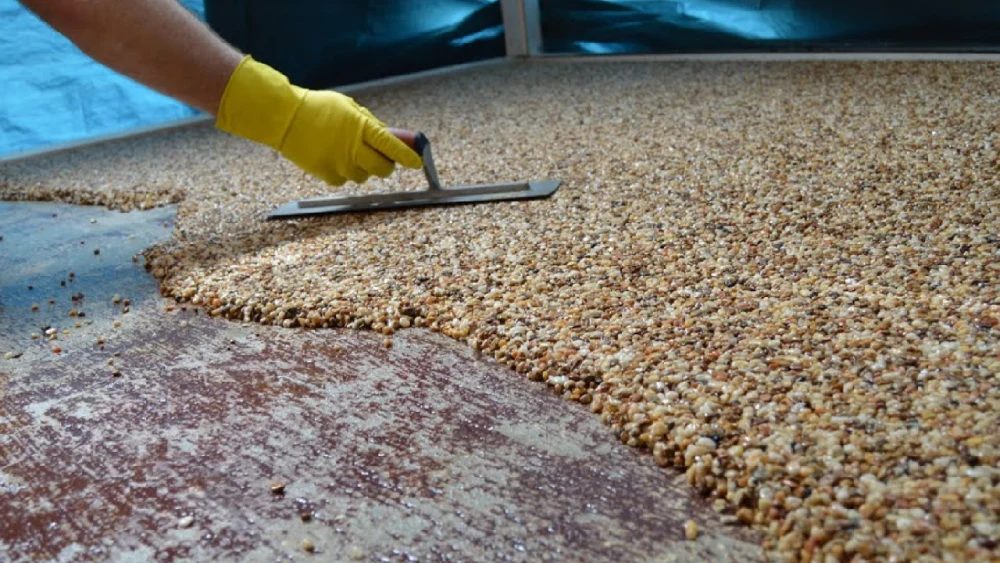
Achieve a flawless, professional finish by following precise application methods from spreading the resin-aggregate mix with steady pressure to managing sections for seamless blending. Proper surface finishing ensures an even texture while preserving the natural beauty of the aggregate.
Laying the Mixture
Use a trowel to apply the resin-aggregate mixture with consistent pressure across each marked grid section. Apply minimal strokes while manipulating the mixture into place, allowing it to compact naturally under gentle pressure.
Section Management
Leave rough edges on each completed section to ensure seamless blending with adjacent areas during application. Work systematically across the pre-marked grid to maintain consistent thickness and appearance throughout the entire surface.
Surface Finishing
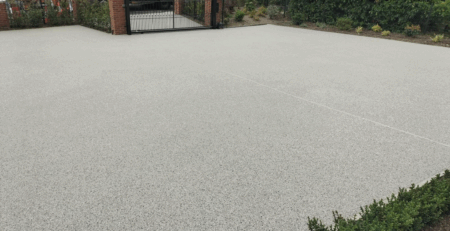
Level and smooth each section carefully to create an even, professional-looking finish across the entire driveway. Polish the surface gently to achieve the desired texture while maintaining the aggregate’s natural appearance and distribution.
Curing and Traffic Management
Proper curing and traffic management are essential for maximizing the durability and performance of resin surfaces. From allowing adequate time for pedestrian access to delaying vehicle traffic, following these guidelines helps prevent early damage.
Initial Curing Period
Allow 8 hours for pedestrian traffic on the newly installed surface, ensuring complete initial set before any foot traffic. Wait 48 hours minimum before parking vehicles due to their substantial weight and potential for surface damage.
Long-term Durability
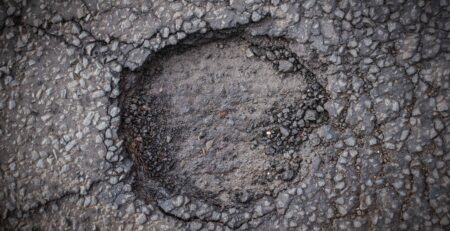
Modern resin surfaces incorporating road surface deterioration prevention techniques offer exceptional longevity when properly installed and maintained. Advanced modern road construction technology ensures resin driveways resist weathering, UV degradation, and thermal expansion effectively.
Load Bearing Considerations
When installing a resin driveway, understanding load-bearing capacity is crucial to prevent cracks and surface wear. With the right base materials, thickness, and reinforcement like geotextiles for high-traffic zones, you can confidently support vehicles without risking structural failure.
Understanding Structural Capacity
A proper explanation of load-bearing capacity involves calculating the maximum supported weight without structural failure or surface damage. Resin driveways typically support standard vehicle loads when installed over adequate base materials and proper thickness specifications.
Base Reinforcement
Strong foundations distribute loads effectively, preventing point loading that could cause cracking or surface deterioration over time. Consider geotextile reinforcement for areas expecting heavy traffic or commercial vehicle access beyond standard residential use.
Colour Selection and Aesthetic Options
Unlock endless design possibilities with coloured aggregate options that enhance your property’s curb appeal. From natural hues to bold, modern tones, tailor your driveway to match your home’s architecture and landscape.
Choosing Aggregate Colours
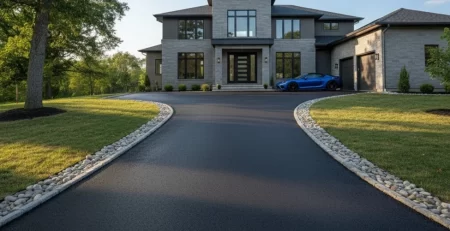
Coloured resin driveways offer extensive customization options, from subtle natural tones to vibrant contemporary colours that complement your property. Select colours that coordinate with existing architecture and landscape features for maximum visual impact and property value enhancement.
Design Integration
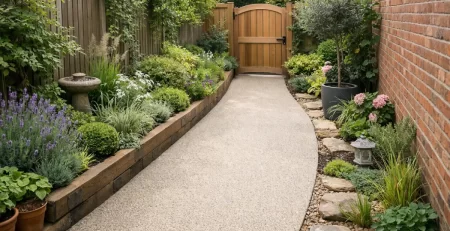
Consider border patterns and decorative elements to create unique visual interest while maintaining practical functionality. Light-coloured surfaces provide better heat reflection compared to dark alternatives, contributing to comfortable surface temperatures during summer months.
Environmental Benefits and Sustainability
Resin driveways support sustainable living with their permeable surfaces that promote natural drainage and reduce flood risks. Their low-maintenance, UV-resistant design minimizes environmental impact, making them a smart and stylish green choice.
Permeable Surface Advantages
Resin driveways offer excellent permeability, allowing natural drainage and contributing to sustainable urban water management systems. This eco-friendly road surfacing approach reduces surface runoff and helps prevent local flooding during heavy rainfall events.
Environmental Impact
Reduced maintenance requirements minimize long-term environmental impact through decreased chemical treatments and surface replacements. UV-resistant formulations prevent degradation and colour fading, maintaining aesthetic appeal without frequent renovations or material waste.
Frequently Asked Questions
How long does resin driveway installation take?
Installation typically requires one to two days, depending on the area size and weather conditions. Preparation work may add additional time for complex projects requiring base repairs or extensive cleaning.
What maintenance does a resin driveway require?
Minimal maintenance involves occasional sweeping and pressure washing to remove debris. The seamless surface prevents weed growth and resists staining from automotive fluids.
Can resin driveways be installed over existing surfaces?
Yes, existing concrete or tarmac provides excellent base material when structurally sound. Damaged surfaces require repair before installation to ensure optimal results.
What is the expected lifespan of a resin driveway?
Properly installed resin driveways last 15-25 years with minimal maintenance. Quality materials and professional installation techniques significantly extend surface life and performance.
Transform Your Property with Professional Results
Installing a resin driveway represents a significant investment in your property’s value and functionality. The combination of aesthetic appeal, durability, and environmental benefits makes resin surfacing an excellent choice for modern homeowners.
By following proper preparation techniques, mixing procedures, and application methods, you’ll create a stunning entrance that enhances your property for decades.Remember that professional installation ensures optimal results, but understanding the process helps you make informed decisions about materials, colours, and maintenance requirements for your new resin driveway.