How to Install a Tarmac Driveway in the UK? 8 Steps to Follow
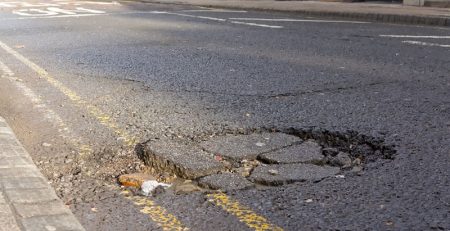
Cracked surfaces, water pooling, and premature deterioration plague poorly installed driveways across the UK. Professional installation demands precise groundwork, regulatory compliance, and expert execution to withstand British weather and heavy traffic.
Installing a tarmac driveway in the UK involves eight critical phases: site assessment, excavation, sub-base preparation, edge restraints, drainage installation, binder course application, wearing course laying, and compaction.
Each stage must meet strict thickness and temperature specifications for longevity. This guide reveals the exact process professional surfacing solutions in the UK use to deliver durable, weather-resistant surfaces.
Steps on How to Install a Tarmac Driveway in the UK
Understanding how to install a tarmac driveway in the UK requires mastering material specifications, weather considerations, and regulatory requirements. Proper execution prevents costly repairs and ensures compliance with UK building standards.
Step 1: Site Assessment and Planning
Professional contractors conduct comprehensive ground surveys before any physical work begins. This phase identifies soil composition, drainage patterns, and potential obstacles.
Accurate measurements determine material quantities and project timelines. Tarmac surfacing and road installation specialists assess gradient requirements for water runoff and check underground utilities to avoid disruptions.
Planning also addresses UK regulatory compliance. Non-permeable surfaces exceeding 5m² require planning permission unless adequate drainage directs water to permeable areas. Understanding these differences between cold and hot lay tarmac helps determine appropriate materials for specific site conditions.
Proper scheduling around tarmac installation in UK weather conditions ensures optimal curing. The ideal installation window runs from May to October when temperatures consistently stay above 10°C.
Step 2: Excavation and Ground Preparation
Excavation creates the foundation for structural integrity. Contractors remove existing surfaces, vegetation, and debris to reach a stable subgrade.
The excavation depth typically ranges from 200 to 250mm, depending on soil stability and expected traffic loads. Clay-heavy soils may require additional treatment to prevent moisture retention.
Driveway installation experts in Essex remove unsuitable materials and level the exposed ground. Proper grading at this stage prevents future settling and ensures adequate water flow away from buildings.
The prepared surface must be firm and free from soft spots. Residential surfacing and paving contractors compact the subgrade using appropriate machinery to create a stable platform for subsequent layers.
Step 3: Installing Edge Restraints
Edge restraints provide crucial structural support and define driveway boundaries. Kerbstones, concrete edges, or timber frames prevent lateral tarmac movement.
These restraints must be set in concrete haunching to withstand vehicle pressure and weather exposure. Proper installation ensures the tarmac maintains its shape over time without spreading or crumbling at the edges.
Commercial paving and surfacing contractors position edging materials before sub-base installation. This sequence allows accurate depth control and prevents contamination during the laying process.
The edging also facilitates clean transitions to adjacent surfaces like pathways or lawns. Understanding road load-bearing capacity helps determine appropriate edge restraint specifications for different traffic volumes.
Step 4: Sub-Base Installation and Compaction
The sub-base forms the load-bearing foundation of the entire driveway structure. A minimum 150mm layer of MOT Type 1 crushed aggregate provides essential stability.
Machine-laid tarmac contractors in Essex spread the aggregate evenly and compact it in 50-75mm layers using twin-drum rollers. Progressive compaction prevents voids and ensures uniform density throughout the sub-base.
This layer must incorporate proper cross-falls and gradients to direct water toward drainage points. Inadequate drainage leads to water accumulation, frost heave, and premature surface failure.
The compacted sub-base should achieve 95% maximum dry density. Expert machine-laid tarmac services in Hertfordshire verify compaction levels using specialized equipment to guarantee structural adequacy. Learning about tarmac site preparation for smooth installation prevents common sub-base mistakes.
Step 5: Drainage System Integration
UK Building Regulations Part H mandates drainage solutions for non-permeable driveways exceeding 5m². Effective systems prevent surface water runoff that overwhelms municipal drainage networks.
Channel drains, French drains, or soakaways collect and redirect water away from the driveway surface. Installation occurs after sub-base compaction but before tarmac application.
Drainage channels should be positioned at the lowest gradient points to capture maximum water flow. Highway resurfacing and maintenance specialists ensure proper pipe sizing and outfall connections to prevent system failure during heavy rainfall.
Permeable alternatives like porous tarmac eliminate planning permission requirements by allowing water infiltration directly through the surface. However, understanding how to prevent road surface deterioration through proper drainage remains essential regardless of surface type.
Step 6: Binder Course Application
The binder course provides the primary structural strength between the sub-base and the surface layer. This hot-mix asphalt layer typically measures 50-70mm thick.
Professional machine-laid tarmac services apply a binder course at temperatures between 105°C and 145°C. Immediate compaction is critical before material cooling begins.
The 20mm aggregate in the binder course creates a robust, stable foundation. Commercial road surfacing contractors spread the hot tarmac evenly using rakes before mechanical compaction.
Proper adhesion between the sub-base and binder course prevents delamination. Some installations include a tack coat to enhance bonding. Knowledge of modern road construction techniques informs optimal binder course specifications for varying applications.
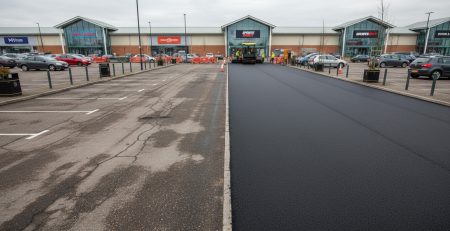
Step 7: Wearing Course Installation
The wearing course creates the final driveway surface that endures direct traffic and weather exposure. This layer typically ranges from 25-40mm thick using 6mm aggregate.
Driveway surfacing specialists in Hertfordshire apply this finer material at optimal temperatures for smooth finishing. The smaller aggregate size produces an attractive, dense surface resistant to water penetration.
Ambient temperature must remain above 10°C during installation to prevent rapid cooling that compromises compaction. Understanding year-round weather effects on tarmac helps schedule installation during favorable conditions.
Application follows immediately after binder course cooling but before full curing. This timing ensures mechanical bonding between layers for unified structural performance. The impact of heavy traffic on tarmac performance emphasizes the importance of adequate wearing course thickness.
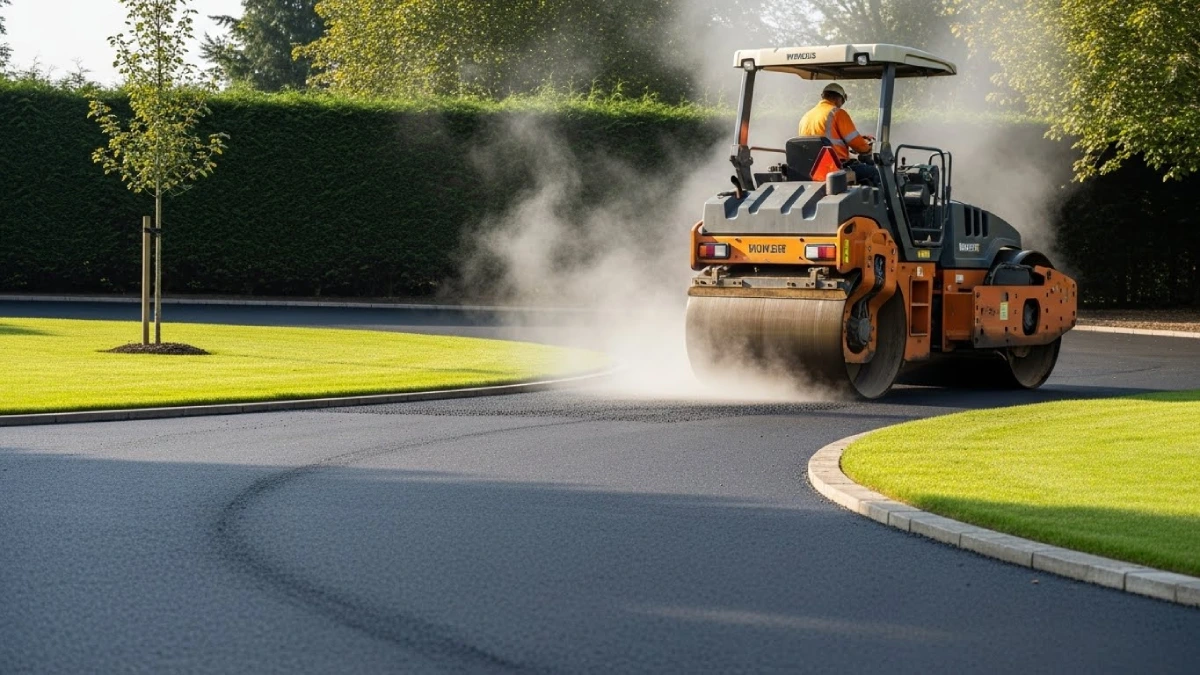
Step 8: Final Compaction and Finishing
Systematic compaction removes air voids and achieves the target density throughout all tarmac layers. Roller compaction begins at the edges and progresses toward the center.
Multiple passes with an appropriate roller weight ensure uniform compression. Resin-bound driveway specialists in Essex adjust compaction patterns based on surface area and geometry to eliminate weak spots.
The final surface should exhibit consistent texture without depressions or irregularities. Joint sealing at connections with existing surfaces prevents water infiltration and extends pavement life.
Newly installed surfaces require 24-48 hours before light foot traffic and 3-5 days before vehicle use. Full structural curing continues for several weeks as volatile compounds evaporate. Following a road maintenance checklist after resurfacing protects the initial investment.
Post-Installation Care Requirements

Initial curing determines long-term surface performance. Avoid parking in the same position repeatedly during the first month to prevent indentation marks from developing.
Heavy loads and sharp turns create additional stress on fresh tarmac. Resin driveway installation specialists in the UK recommend distributing vehicle weight evenly during the early curing phase.
Chemical curing continues for several months as the bitumen binder fully stabilizes. Understanding machine lay vs hand lay tarmac comparison helps explain performance differences based on installation methods.
Regular maintenance, including jet washing, crack sealing, and periodic resealing, extends surface lifespan. Professional driveway jet washing services remove contaminants without damaging the surface finish.
Cost and Timeframe Considerations
UK tarmac installation averages £70-120 per m², including materials and labor. A standard 50m² driveway typically costs around £4,500, with an additional £1,000 for foundation work.
Material costs include hot-mix tarmac at approximately £45 per ton, covering 8m². Understanding the cost of machine-laid tarmac in the UK helps budget effectively for quality installations.
Installation timeframes vary by project size. Most residential driveways are completed within 1-3 days, with curing periods adding 3-5 days before normal use. Learning about machine-laid tarmac lifespan in UK conditions demonstrates the value of proper installation techniques.
Regional labor rates and site accessibility affect total costs. Resin bound surfacing contractors in the UK provide detailed quotes accounting for specific project variables. Knowledge of pothole repair costs in the UK underscores the importance of quality initial installation.
Regulatory Compliance and Permissions
Non-permeable surfaces exceeding 5m² require planning permission unless drainage directs runoff to permeable areas. Applications must include detailed drainage plans and material specifications.
Permeable tarmac alternatives avoid planning requirements by allowing water infiltration. However, school playground and sports surfacing specialists note that installation complexity increases with permeable systems.
Local authorities review applications to ensure compliance with environmental and flood prevention standards. Block paving installation services offer alternative permeable solutions when planning permission proves challenging.
Failure to obtain required permissions results in enforcement actions and potential removal orders. Understanding low-maintenance driveway surfacing solutions helps select compliant materials that minimize ongoing obligations.
Areas We Cover Across the UK
Total Surfacing is based in the South East, delivering professional surfacing, pothole repairs, and resin installations across Hertfordshire, Essex, London, and surrounding areas.
Our local teams provide reliable driveway surfacing services throughout Essex, including resin bound driveway installations, machine lay tarmac services in Essex, and responsive pothole repair services in Essex for both residential and commercial sites.
We offer the same high standards in Hertfordshire, with expert driveway surfacing supported by machine lay tarmac services in Hertford and dependable pothole repair services in Hertford.
Our coverage typically includes:
- Key towns and routes in Hertford, Chelmsford, Harlow, Epping, and Colchester
- Private estates, business parks, and retail developments across the wider South East
- Nationwide support for larger commercial surfacing programmes when required
This strong regional presence keeps travel times low, response times fast, and local knowledge sharp. It also enables us to support ongoing maintenance programs, from seasonal pothole repairs to planned resurfacing, providing clients with a trusted long-term surfacing partner rather than a one-off contractor.
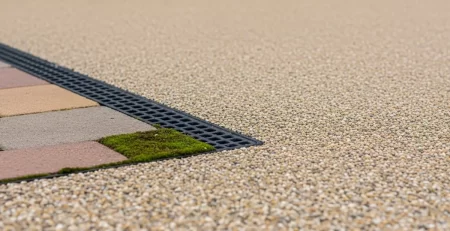
Alternative Surfacing Solutions
Several materials complement or replace traditional tarmac installations. Resin bound driveway installers in Hertfordshire offer permeable alternatives with decorative finishes.
Block paving, resin-bound surfaces, and concrete each provide distinct advantages. Bespoke resin and paving finishes deliver customized aesthetics while maintaining structural performance.
Selection depends on budget, aesthetic preferences, and maintenance requirements. Fast driveway and surfacing installation services accommodate various timelines and project constraints.
Understanding the benefits of machine-laid tarmac for car parks and roads helps evaluate tarmac against alternative materials. Each option requires specific installation expertise and offers different performance characteristics.
Frequently Asked Questions
Can you install tarmac in the winter months?
Winter installations face significant challenges due to temperature requirements. Tarmac needs ambient temperatures above 10°C for proper curing and compaction.
Cold conditions cause rapid cooling, preventing adequate compaction and bonding. Most reliable pothole repair services in Hertfordshire use cold-lay patching materials during the winter months as temporary solutions.
Winter pothole repair solutions provide emergency fixes but lack the longevity of hot-mix installations. Full resurfacing projects should wait for warmer spring temperatures to ensure optimal results.
How thick should tarmac be on driveways?
Residential driveways require a minimum combined thickness of 75-100mm across binder and wearing courses. The sub-base adds another 150-200mm of compacted aggregate.
Traffic volume and vehicle weight determine exact specifications. Heavier vehicles demand thicker applications to prevent premature failure and rutting. Understanding key factors affecting paved surface longevity includes proper thickness specifications.
Pothole repair services in Essex frequently address failures from inadequate thickness. Professional installations specify layers based on soil conditions and expected usage patterns.
What happens if it rains during installation
Rain during installation compromises tarmac quality and bonding characteristics. Moisture prevents proper compaction and interferes with bitumen adhesion.
Installation should cease immediately when rain begins. Expert pothole repair solutions often address failures resulting from wet-weather installations.
The sub-base must remain dry before tarmac application. Surface water pooling indicates inadequate drainage that requires correction before proceeding. Knowledge of effective pothole repair methods helps remediate rain-damaged installations.
Do you need drainage for tarmac driveways
UK regulations mandate drainage solutions for non-permeable driveways exceeding 5m². Proper drainage prevents flooding and protects municipal systems from excessive runoff.
Channel drains, soakaways, or permeable surfaces satisfy regulatory requirements. Road and car park line marking services often coordinate with drainage installations for comprehensive site solutions.
Directing runoff toward lawns or borders provides natural drainage alternatives. Understanding emergency pothole repair services requirements highlights drainage’s role in preventing surface deterioration. Outdoor step installation services integrate drainage planning into comprehensive hardscape projects.
Quality Delivers Lasting Performance
Quality installations deliver long-term performance. Installing a tarmac driveway in the UK across eight precise phases ensures structural strength, proper drainage, and weather resistance.
Professional control of sub-base depth, layer thickness, and curing prevents premature failure. Understanding machine lay tarmac for high-traffic areas, common mistakes in machine lay tarmac services in Essex, and the long-term benefits of regular road maintenance helps protect your investment.
Awareness of potholes and vehicle safety risks, surface options, and pothole repair lifespan and durability supports smarter maintenance decisions.