How to Clean Driveway Pavers?
Driveway pavers collect dirt, moss, algae, weeds, tyre marks, oil stains, and joint debris through daily use. The serious step is not blasting the surface quickly, because aggressive cleaning can wash out joint sand, expose weak pavers, or trap stains before sealing. The experienced solution is a controlled order: Clear and Weed, Wash and Scrub, then Rinse and Re-sand only when the surface is ready.
Want cleaner pavers without damaging the joints? Visit our service page for expert help to clean driveway pavers safely and keep your surface looking fresh for longer.
How to clean driveway pavers?
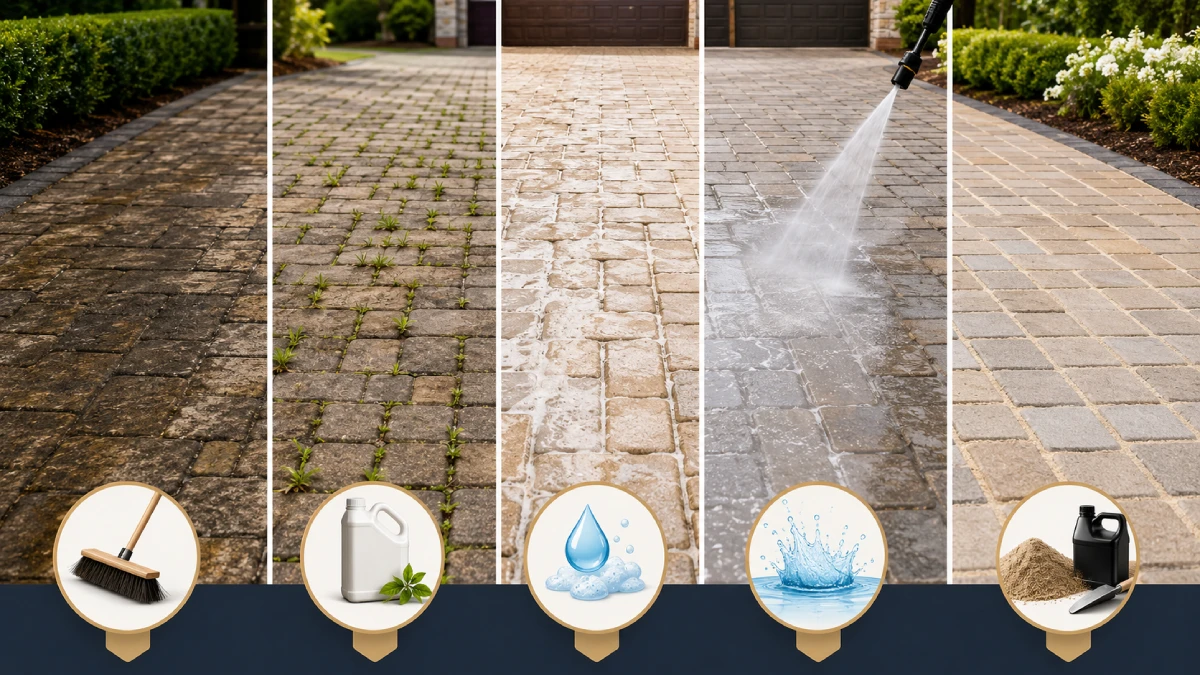
Driveway pavers should be cleaned in a clear order: inspect, sweep, remove weeds, treat stains, wash, scrub, rinse, dry, re-sand, and seal only if needed. This order protects the paver face and the joint structure. It also prevents stains, moss, and moisture from being locked under sealer.
The most common mistake is using pressure too early. A pressure washer can remove dirt quickly, but it can also remove joint sand if used badly. That is why a safer process starts with hand cleaning and stain treatment.
| Cleaning Stage | Main Action | Why It Matters |
| Inspect | Check pavers, joints, stains, and drainage | Prevents hidden damage |
| Clear and Weed | Remove debris, moss, weeds, and roots | Protects the joints |
| Treat Stains | Use degreaser or paver-safe cleaner | Stops marks spreading |
| Wash and Scrub | Clean with warm water and stiff broom | Removes embedded grime |
| Rinse | Flush residue fully | Prevents dull surface film |
| Dry | Wait until pavers are fully dry | Prepares for sanding |
| Re-sand | Brush sand into joints | Restores stability |
| Seal | Optional final protection | Locks in clean finish |
For surface cleaning, repair planning, and driveway preparation support, Total Surfacing Solutions can help homeowners understand whether a driveway needs cleaning, re-sanding, sealing, or deeper surface work. This matters when the pavers are stained, loose, or losing joint sand. A clean finish should always protect the structure underneath.
Inspect the surface before cleaning
Inspection helps you avoid making weak areas worse. Some pavers may already be loose, chipped, sunken, or missing joint sand. Cleaning should expose problems safely, not turn small defects into repairs.
Walk the driveway before using any cleaner. Look for oil spots, tyre marks, moss patches, algae, loose blocks, low areas, and standing water. Mark fragile sections that should not receive high pressure.
A small test patch is useful on older pavers. It shows whether cleaner, brushing, or water pressure changes the colour or lifts old sealer. If the test area turns cloudy, etched, or patchy, stop and use a gentler method.
Check these areas first:
- Loose or rocking pavers
- Missing joint sand
- Heavy weed growth
- Oil and grease marks
- Moss or algae patches
- Old sealer haze
- Low drainage areas
- Cracked or chipped blocks
If the pavers are severely stained or the surface is failing, cleaning may not be the full answer. When the surface is part of a larger driveway decision, the driveway material basics can help compare repair, replacement, and upgrade options. That prevents spending time on a surface that needs deeper work.
Clear and weed without weakening joints
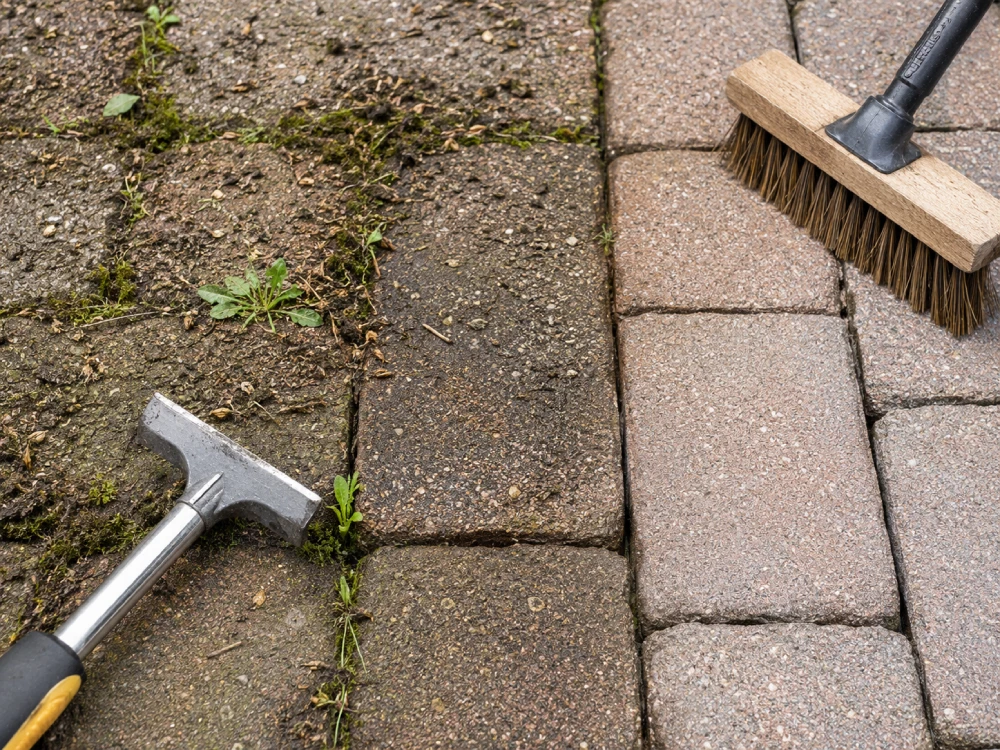
The first real cleaning step is Clear and Weed. This means removing loose debris, pulling weeds, clearing moss, and preparing the joints without digging out the bedding layer. It makes the washing stage safer and more effective.
Start by sweeping the full driveway with a stiff outdoor broom. Remove leaves, soil, stones, grass clippings, and loose dirt from the surface. Do not wash this debris into drains because it can block water flow.
Pull weeds from the roots where possible. Use a joint scraper carefully, but avoid gouging deep into the sand between pavers. If the joints are already low, plan to re-sand after cleaning.
Moss and algae should be loosened before washing. A paver-safe moss cleaner can be used where green growth is heavy. Keep pets, children, plants, and grass protected until the surface has been rinsed thoroughly.
Use this quick order:
- Sweep the full surface
- Clear edges and corners
- Pull weeds from the root
- Scrape moss from joints
- Bag loose debris
- Check joint depth
- Keep drains clear
If pavers are going to be sealed after cleaning, joint care becomes even more important. The driveway paver sealing guide explains why cleaning, drying, and joint preparation must happen before any protective finish. Sealing dirty or damp pavers can trap the exact problems you are trying to remove.
Treat stains before the main wash
Stains should be treated before general washing. Oil, tyre marks, rust, algae, and grime do not respond to the same method. A single cleaner used across every problem can spread marks instead of removing them.
Fresh oil should be blotted quickly with absorbent material. After that, apply a paver-safe degreaser and let it dwell for the correct time. Scrub the spot with a stiff brush before rinsing.
Tyre marks often need agitation. Use a driveway-safe cleaner and work it into the surface with steady brushing. Do not use harsh acid on concrete or natural stone unless the product is specifically suitable.
Moss and algae need a different approach. Apply a suitable organic growth cleaner, allow dwell time, then scrub and rinse. Shaded areas may need more regular treatment because moisture helps green growth return.
| Problem | Best First Action | Avoid |
| Fresh oil | Blot, degrease, scrub | Sealing over it |
| Tyre marks | Paver-safe cleaner and brush | Raw acid |
| Moss | Organic growth treatment | Dry brushing only |
| Algae | Cleaner, dwell, rinse | Letting pets return early |
| Rust | Specialist rust remover | Random household acids |
| Old haze | Test patch first | Strong pressure immediately |
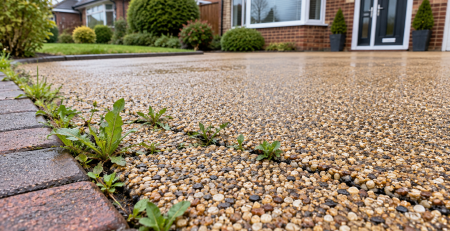
If the surface is resin rather than pavers, use the resin driveway cleaning guide instead. Resin and pavers have different joint structures, drainage behaviour, and cleaning risks. Matching the cleaner to the surface prevents damage.
Wash and scrub the pavers safely
The main cleaning stage is Wash and Scrub. Use warm water, a paver-safe cleaner, and a stiff broom to lift dirt from the surface. This is the safest method when you do not want to disturb joint sand.
Work in small sections so the cleaner does not dry on the pavers. Apply the cleaner, let it dwell, scrub the dirty areas, then rinse before moving forward. Focus extra effort on tyre paths, shaded strips, and stained zones.
A push broom is useful for manual cleaning. It gives controlled pressure and keeps the joint structure safer than a narrow pressure washer jet. It is slower, but it lowers the risk of blasting sand from the joints.
Use this manual method:
- Wet the surface lightly
- Apply paver-safe cleaner
- Let it dwell briefly
- Scrub with a stiff broom
- Work in manageable sections
- Rinse before residue dries
- Repeat on stubborn areas
If the pavers still look dull after washing, the issue may be embedded staining or old sealer. Do not keep increasing chemical strength without testing. Clean more carefully before deciding whether sealing or restoration is needed.
Pressure wash only with control
Pressure washing can clean pavers well, but it must be controlled. The main risk is blasting out joint sand or leaving pressure marks across the surface. This is why many homeowners worry about using a pressure washer on block paving.
Use a surface cleaner attachment where possible. It spreads pressure more evenly and reduces striping. A wide fan nozzle is safer than a narrow jet because it avoids cutting into joints.
Keep the nozzle moving at all times. Do not aim straight down into the gaps between pavers. Work at an angle and stop if sand is being removed heavily.
Safe pressure washing rules:
- Test a small area first
- Use moderate pressure
- Choose a wide fan nozzle
- Avoid narrow jet tips
- Keep the spray moving
- Do not blast directly into joints
- Expect some sand loss
- Re-sand after drying if needed
Fragile, loose, sealed, or older pavers need extra care. Aggressive cleaning can lift old sealer, expose surface wear, or loosen blocks. If the driveway has asphalt edges or adjoining tarmac, the asphalt fatigue crack explanation may help identify nearby cracking risks before washing.
Rinse and re-sand the joints
The next stage is Rinse and Re-sand. Rinsing removes cleaner residue, loosened dirt, and chemical film. Re-sanding restores the joint structure after washing removes or lowers sand.
Rinse from the highest point downward. Push dirty water away from the driveway, garage, walls, and planting beds. Do not leave detergent in corners, edges, or drainage channels.
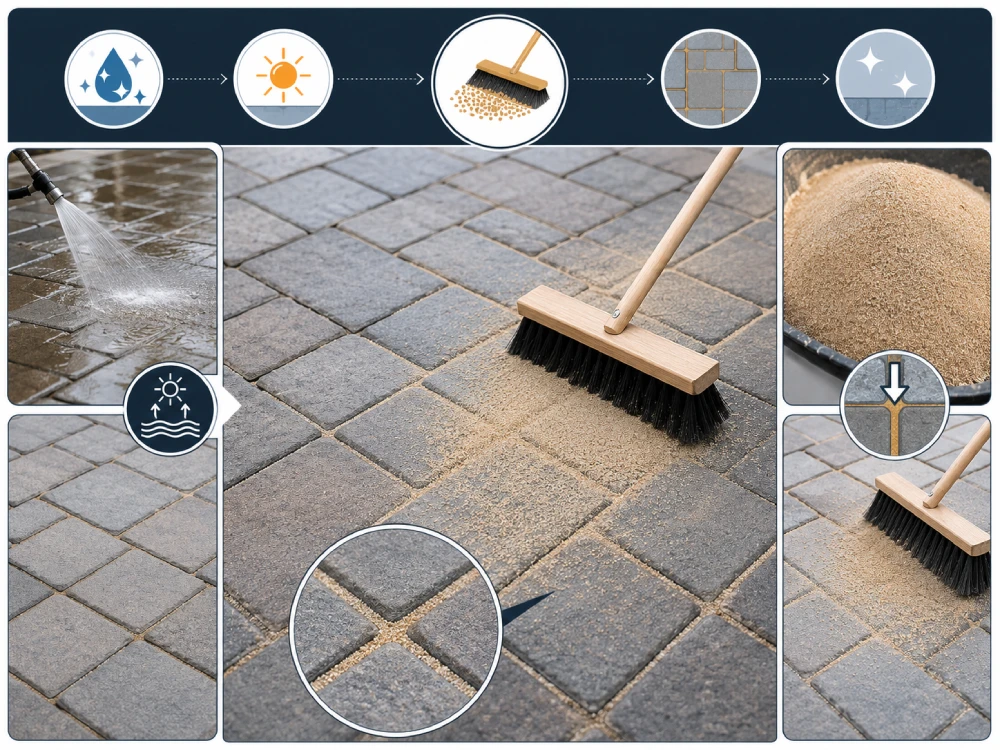
Let the pavers dry completely before adding sand. Wet joints cause sand to clump and sit unevenly. Dry joints accept kiln-dried sand or suitable jointing sand more cleanly.
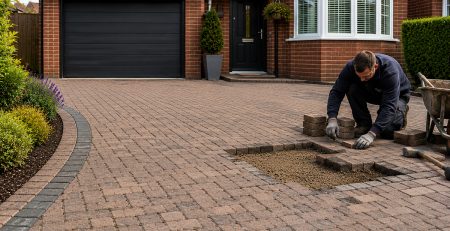
Brush sand diagonally across the pavers. This helps fill the joints without dragging too much sand along one line. Remove excess sand from the surface before any sealing step.
Re-sanding matters because joints help keep the pavers stable. Missing joint sand can allow movement, weed growth, and water entry. For wider structural thinking, the road base preparation guide explains how surface stability depends on the layers beneath.
Let the driveway dry before sealing
Drying is not a waiting detail. It is a key step before re-sanding, sealing, or checking final stain removal. Damp pavers can cause white haze, poor sealer bonding, or trapped moisture.
After a light wash, drying may take a full day in good weather. After pressure washing, shaded or joint-heavy areas may need longer. Always check corners and low areas because they hold moisture longer.
Do not seal over dampness, oil, moss, algae, or detergent residue. Sealer can lock in stains and make them harder to remove later. Joint sand should also be stable before sealer is applied.
If the driveway is being upgraded after cleaning, local resin options may be relevant. Homeowners can review resin bound driveways in Bedfordshire, resin bound driveways in Oxford, and resin bound driveways in Cambridgeshire when paver maintenance no longer suits the property goal. Cleaning helps reveal whether the surface is worth keeping or ready for a new finish.
Match the method to the problem
Different paver problems need different cleaning methods. General dirt can be handled with sweeping, mild cleaner, scrubbing, and rinsing. Oil, moss, algae, and joint problems need more targeted steps.
For oil stains, use degreaser before the main wash. For moss, use organic growth treatment and improve drainage if possible. For weeds, remove roots and restore joint sand after cleaning.
For preparing pavers to seal, follow the full process. Clean first, rinse fully, dry completely, re-sand joints, remove excess sand, then seal. Skipping one step can lead to a poor finish.
| Cleaning Problem | Correct Method | Follow-Up |
| Dirt and dust | Sweep, wash, scrub | Rinse fully |
| Oil stains | Degreaser and dwell time | Repeat if needed |
| Moss | Moss cleaner and scrub | Improve damp areas |
| Weeds | Pull roots and clean joints | Re-sand gaps |
| Tyre marks | Traffic-safe cleaner | Brush firmly |
| Sealing prep | Clean, dry, re-sand | Seal only when ready |
When the driveway is near a resin area, compare cleaning with the resin bound drainage basics. Resin and pavers manage water differently. The right method depends on surface type, joint design, and drainage.
Avoid mistakes that damage pavers
Most cleaning failures come from rushing. High pressure, wrong chemicals, damp sealing, and skipped re-sanding can all create new problems. A careful clean protects both appearance and structure.
Do not use raw bleach casually around pets, plants, and lawns. Do not mix cleaning chemicals. Always rinse thoroughly before children or pets return to the driveway.
Do not seal immediately after washing. Do not apply polymeric sand on damp pavers. Do not assume every paver material can handle acid cleaner or high pressure.
Avoid these mistakes:
- Blasting joints with a narrow nozzle
- Washing out sand and ignoring it
- Sealing over oil stains
- Sealing damp pavers
- Using harsh acid without testing
- Letting cleaner dry on the surface
- Leaving dirty water in drains
- Re-sanding wet joints
- Skipping a test patch
- Ignoring loose pavers
If cleaning exposes heavy surface failure, deeper preparation may be needed. The resin driveway preparation steps can help compare cleaning with resurfacing preparation. The resin driveway value factors may also help when deciding whether cleaning or replacement gives better long-term value.
When cleaning shows bigger surface issues?
Cleaning sometimes reveals that the driveway has bigger problems than dirt. Sunken pavers, failed joints, poor drainage, and damaged base layers may become more obvious after washing. This is useful because hidden issues can then be handled properly.
If pavers are in a domestic driveway, local upgrade options may be considered after inspection. Homeowners can compare resin bound driveways in Essex and resin bound driveways in Hertfordshire when cleaning no longer delivers the finish or stability needed. This is especially relevant when weeds, stains, and joint movement keep returning.
For commercial or shared access areas, the surface needs a broader maintenance view. The industrial yard surface structure, business park road care planning, and estate road surfacing guide can support heavier-use surface planning. Cleaning is only one part of keeping high-traffic surfaces safe and presentable.
If you are unsure whether to clean, seal, or repair, Total Surfacing Solutions can help assess the next step. A paver driveway may only need re-sanding and cleaning. Another driveway may need drainage correction, joint restoration, or a different surface.
How to Clean Driveway Pavers? Resin Bound Driveways Area Coverage
Resin bound driveways are important for homeowners who want a clean, durable, and low-maintenance surface that can handle changing UK weather, daily vehicle use, and long-term kerb appeal expectations. Rain, frost, humidity, heat, dust, drainage pressure, and seasonal surface wear can all affect driveway performance, especially when older pavers, concrete, gravel, or tarmac start looking tired or difficult to maintain.
Resin Bound Driveways in Bedfordshire
Bedfordshire homes often deal with regular rainfall, winter frost, shaded damp areas, and daily vehicle movement from family properties, village homes, and suburban driveways. Older paving, loose gravel, and worn concrete can become stained, uneven, or harder to keep clean through seasonal changes. For homeowners who want a smoother surface with better kerb appeal and easier maintenance, resin bound driveways in Bedfordshire can be a practical long-term upgrade.
Resin Bound Driveways in Cambridgeshire
Cambridgeshire driveways often need to manage flat ground conditions, rainwater movement, surface dust, seasonal dampness, and drainage challenges around rural homes, new-build estates, and larger residential properties. When older surfaces hold water or lose their clean finish, they can become slippery, stained, or difficult to maintain. For properties that need a neater, more stable, and weather-ready surface, resin bound driveways in Cambridgeshire can help improve both appearance and everyday usability.
Resin Bound Driveways in Essex
Essex properties may face rain, summer heat, coastal air in some areas, surface dust, tyre marks, and strong kerb appeal expectations from commuter homes, family properties, rental homes, and coastal residences. Salt air, moisture, and frequent vehicle use can make older driveways look faded, stained, or untidy over time. If the existing surface no longer matches the property’s appearance or maintenance needs, resin bound driveways in Essex can provide a cleaner and more durable driveway option.
Resin Bound Driveways in Hertfordshire
Hertfordshire driveways are often expected to look smart, clean, and suitable for high-value commuter homes, family properties, and well-kept residential streets. Rain, frost, shaded entrances, moss growth, and regular parking can make old concrete, tarmac, block paving, or gravel look tired over time. For homeowners who want a decorative surface that supports kerb appeal while reducing maintenance pressure, resin bound driveways in Hertfordshire can be a strong local driveway solution.
Resin Bound Driveways in Oxford
Oxford properties include period homes, townhouses, modern driveways, student rentals, and visitor-heavy residential areas where driveway appearance can strongly affect first impressions. Rain, frost, humidity, shaded entrances, and frequent foot or vehicle traffic can make older surfaces slippery, stained, or uneven. For homeowners who want a finish that suits local property character while improving drainage, safety, and everyday maintenance, resin bound driveways in Oxford can be a reliable upgrade.
FAQs
Can I clean driveway pavers without pressure washing?
Yes, you can use warm water, paver-safe cleaner, a stiff broom, dwell time, and a hose rinse. This method is slower but safer for joints. It works best for dirt, light stains, and routine maintenance.
Why did polymeric sand not harden?
Polymeric sand may fail if the pavers were damp, excess sand was left on the surface, or the watering step was wrong. It also needs proper joint depth and clean gaps. Follow the product instructions carefully.
Is bleach safe around pets after cleaning?
Pets should stay away while any strong cleaner is being applied, dwelling, or rinsed. Use paver-safe cleaner where possible and rinse the surface fully. Let the driveway dry before pets return.
Should I clean pavers before sealing?
Yes, pavers must be cleaned before sealing. Dirt, oil, moss, algae, and moisture can become trapped under sealer. Clean, rinse, dry, re-sand, then seal only when the surface is ready.
What if pavers still look dirty after washing?
Remaining marks may be oil, tyre carbon, algae, rust, efflorescence, or old sealer haze. Use the correct stain treatment instead of repeating the same wash. Test a small patch before using stronger products.
Conclusion
Driveway pavers should be cleaned in the right order: inspect, Clear and Weed, treat stains, Wash and Scrub, then Rinse and Re-sand. This process removes grime while protecting joint sand, drainage, and paver stability. Rushed cleaning can wash out joints, trap stains, or cause sealing failure.
The safest result comes from matching the cleaning method to the problem. Use gentle manual cleaning for routine dirt, targeted cleaner for stains, careful pressure washing when needed, and re-sanding after deep cleaning. For professional surfacing guidance, Total Surfacing Solutions can help decide whether cleaning, sealing, repair, or resurfacing is the right next step.